Creating a Reservation/Transaction
Selecting Dates and Times
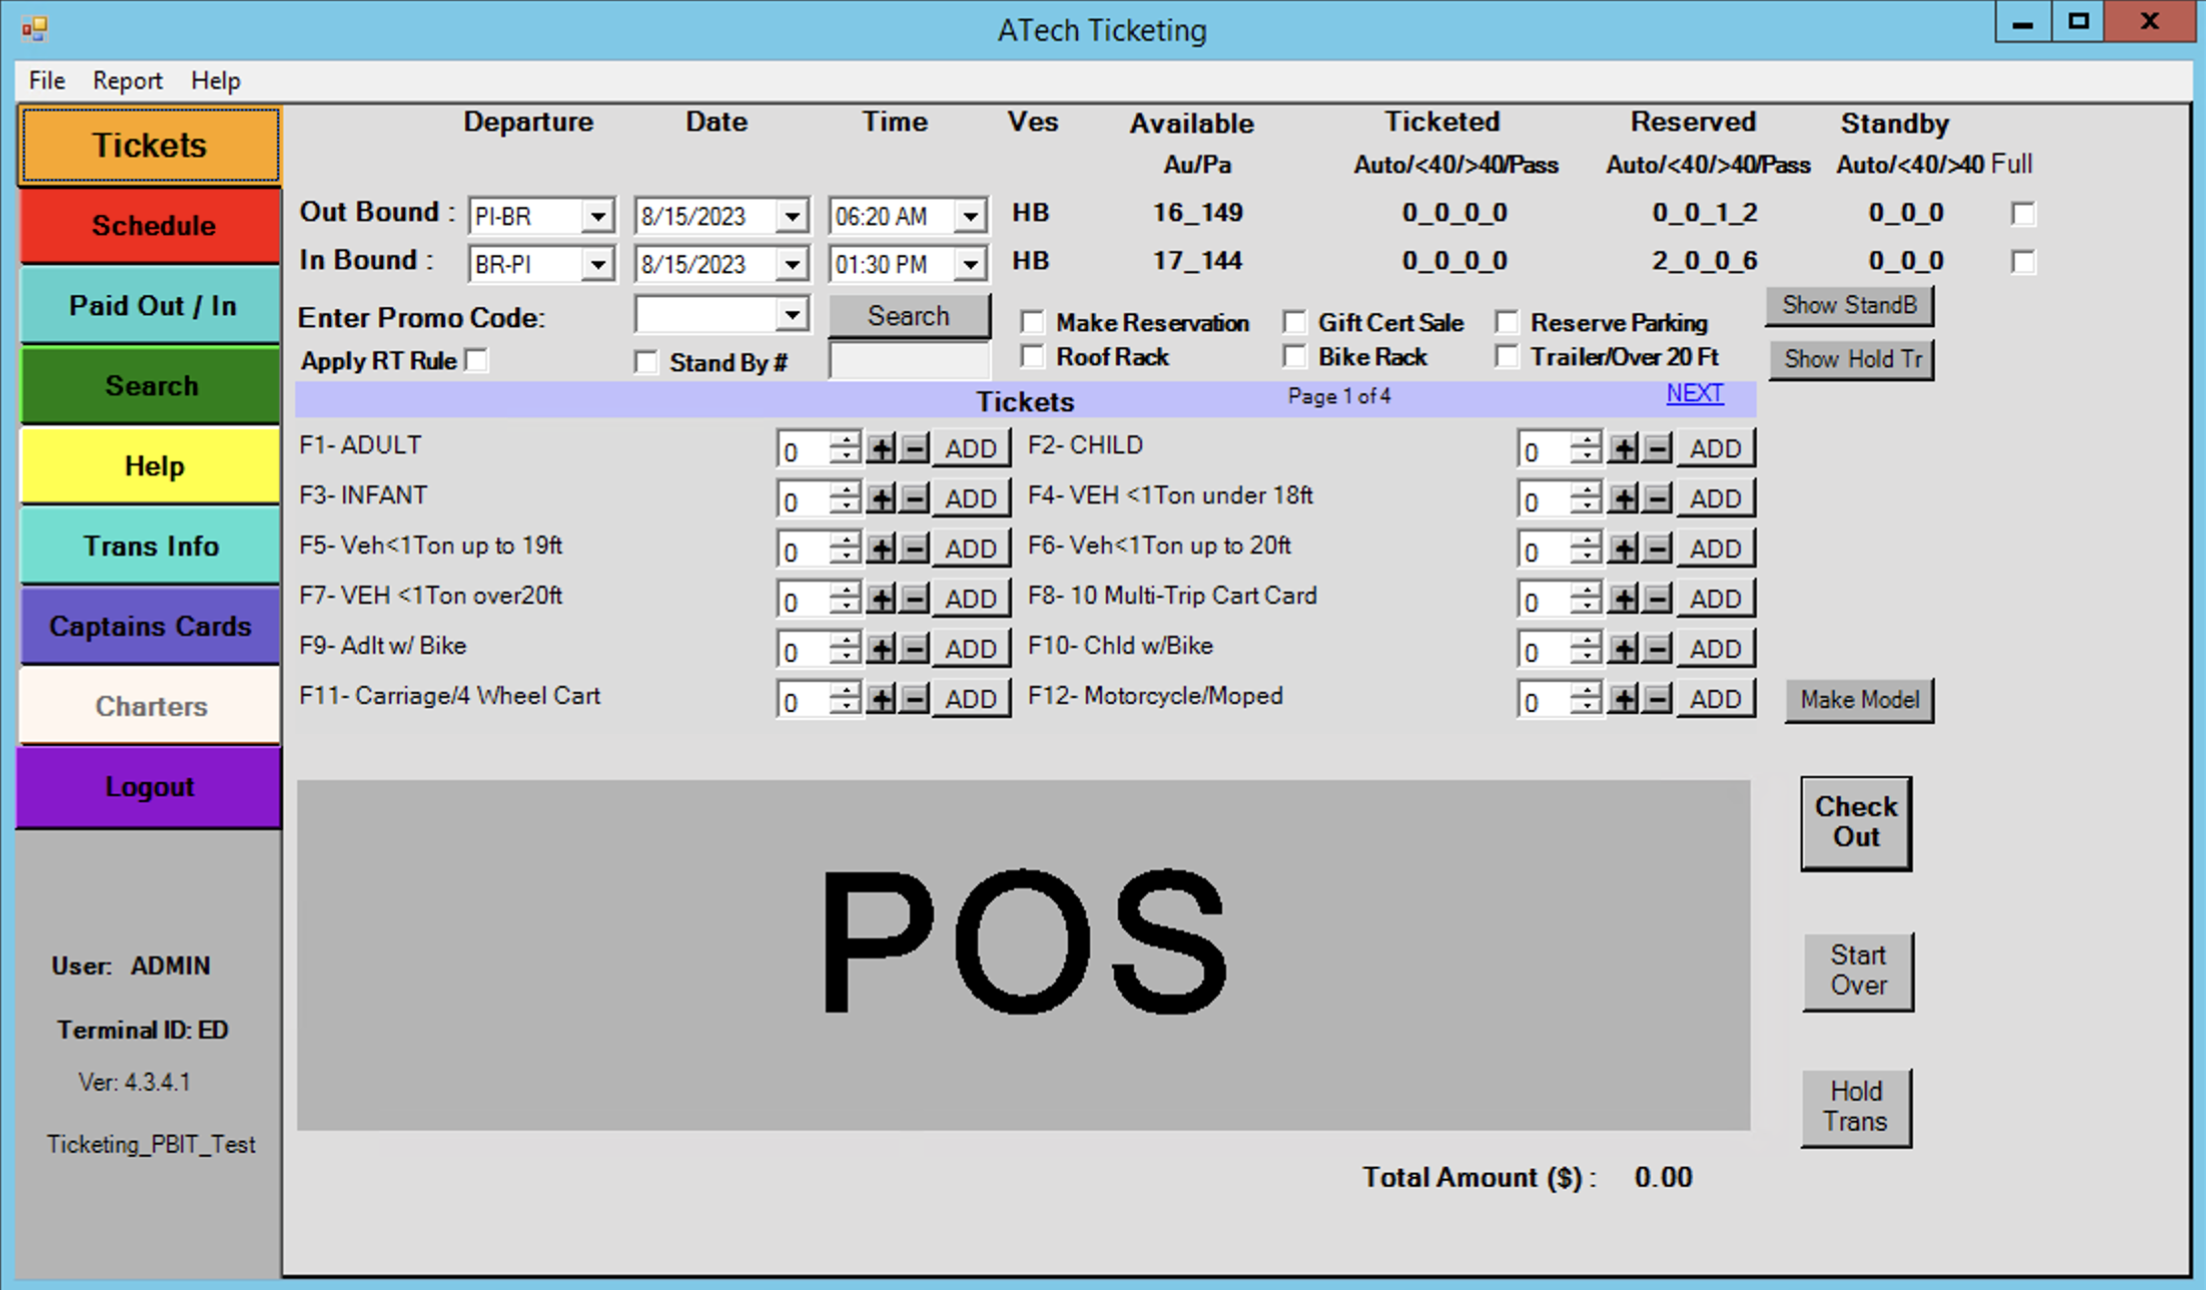
The first option to choose a departure date and time is to select the yellow “Tickets” tab.


- Select outbound departure point
- Select outbound departure date
- Select outbound departure time
- If booking a return trip select inbound departure point
- Select outbound departure date
- Select outbound departure time
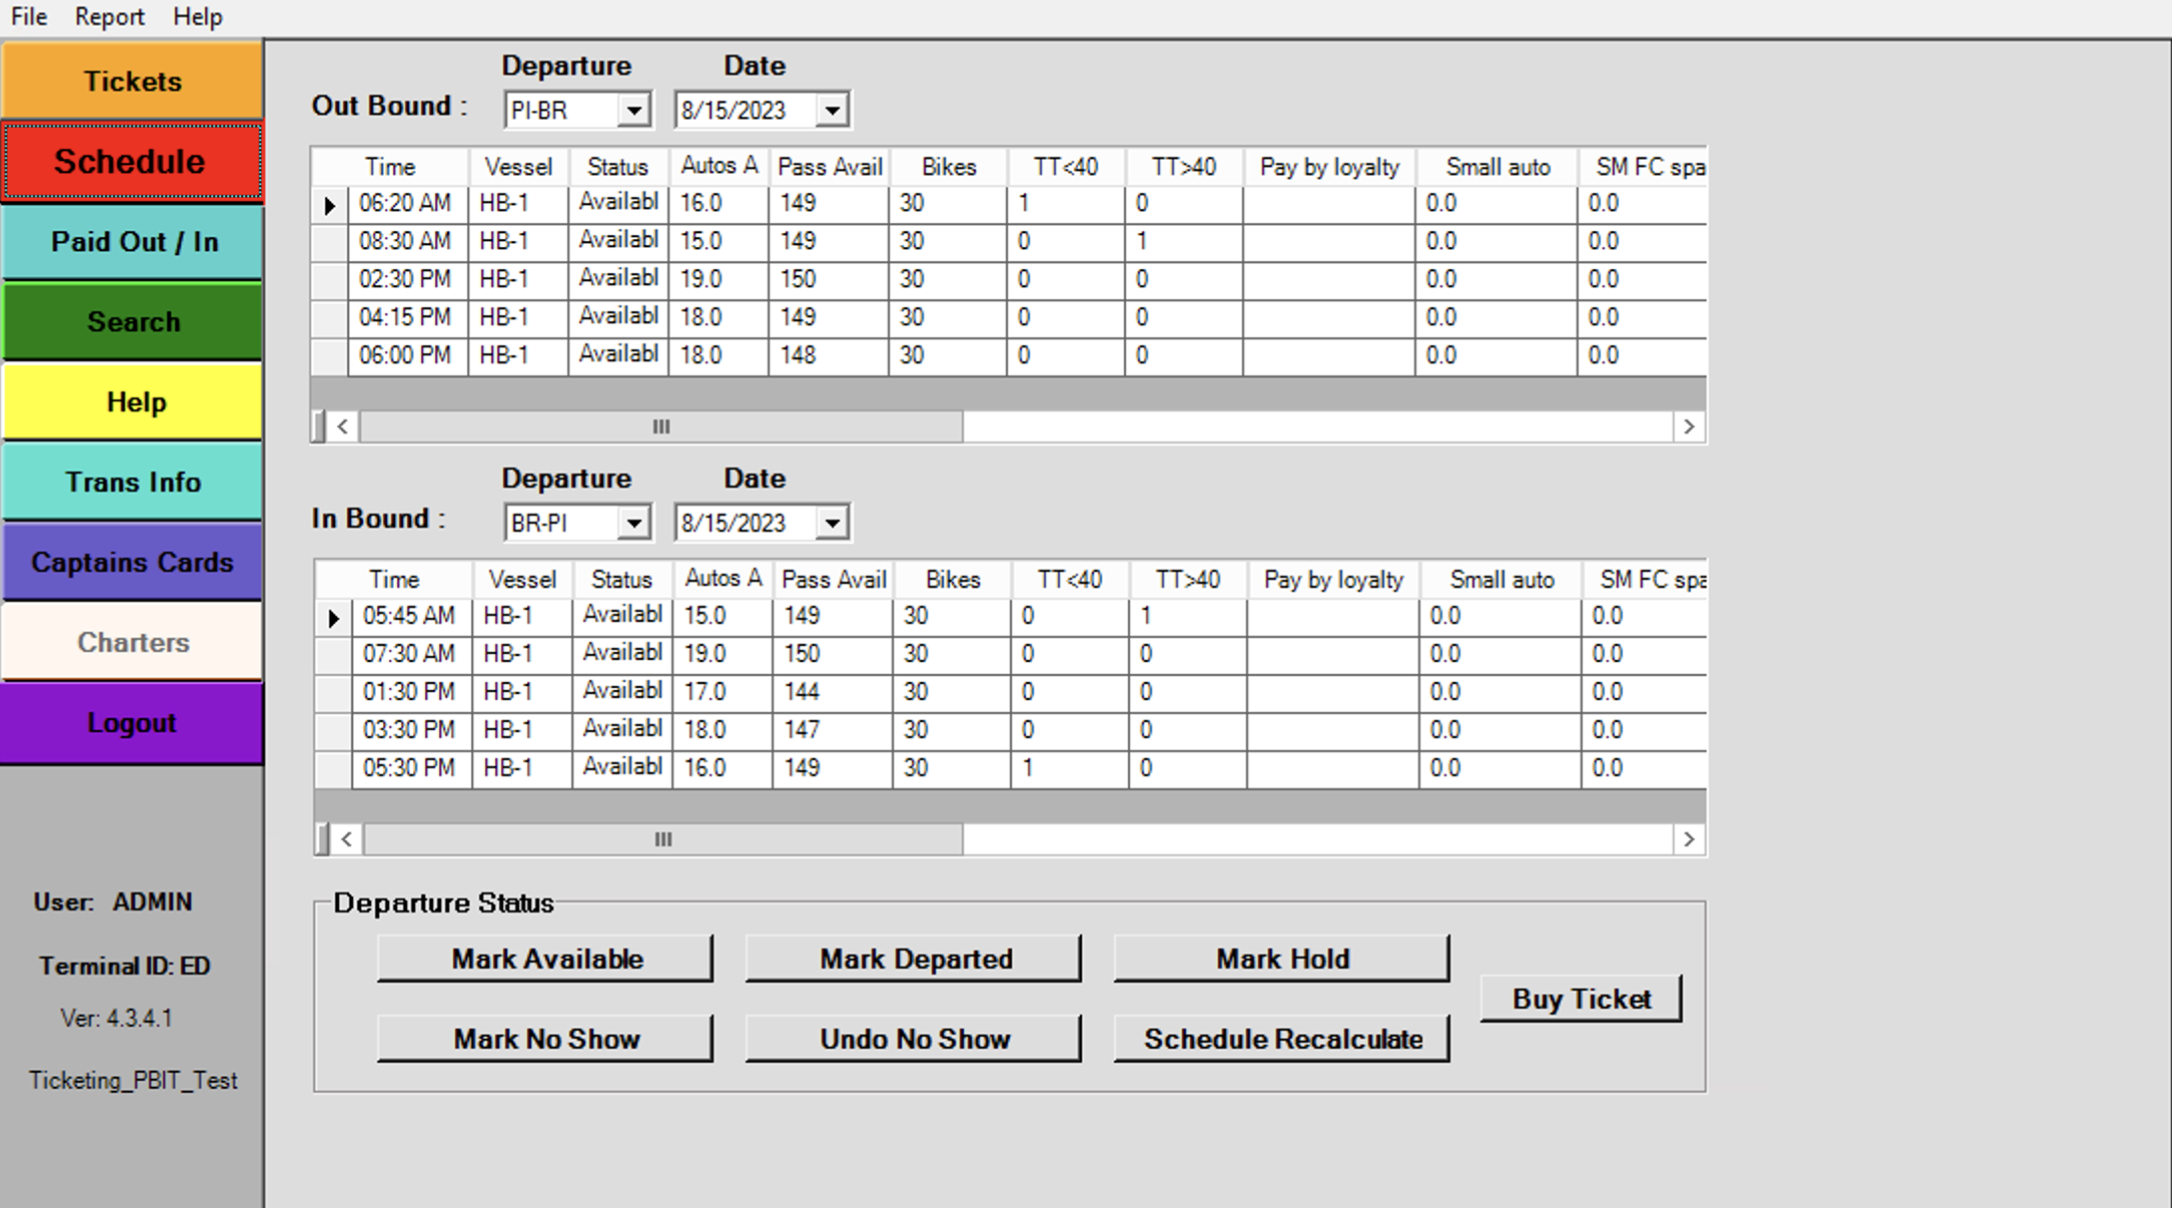
The other option for picking departure information is to click on the red “Schedule” tab.

- Select outbound departure point
- Select outbound departure date
- Select outbound departure time
- If booking a return trip select inbound departure point
- Select outbound departure date
- Select outbound departure time
- Click “Buy Ticket“
Selecting Ticket Type(S)
After selecting departure date and time you must next select the ticket types for the transaction.

- Using the F1 – F12 keys of the + – buttons, select the desired ticket types for the transaction.
- If the ticket type is not displayed on the page click the
 and
and  buttons to change between the ticket pages. You can also use the SPACE bar to go forward or ESC key to move back.
 - You can also add racks or a trailer to a vehicle by selecting a checkbox at the top.

- When adding a rack/trailer or booking a truck you will be prompted with a calculator to adjust the dimensions of the vehicle.
- After you have selected the desired tickets for the transaction click on the
 button.
Apply Discounts
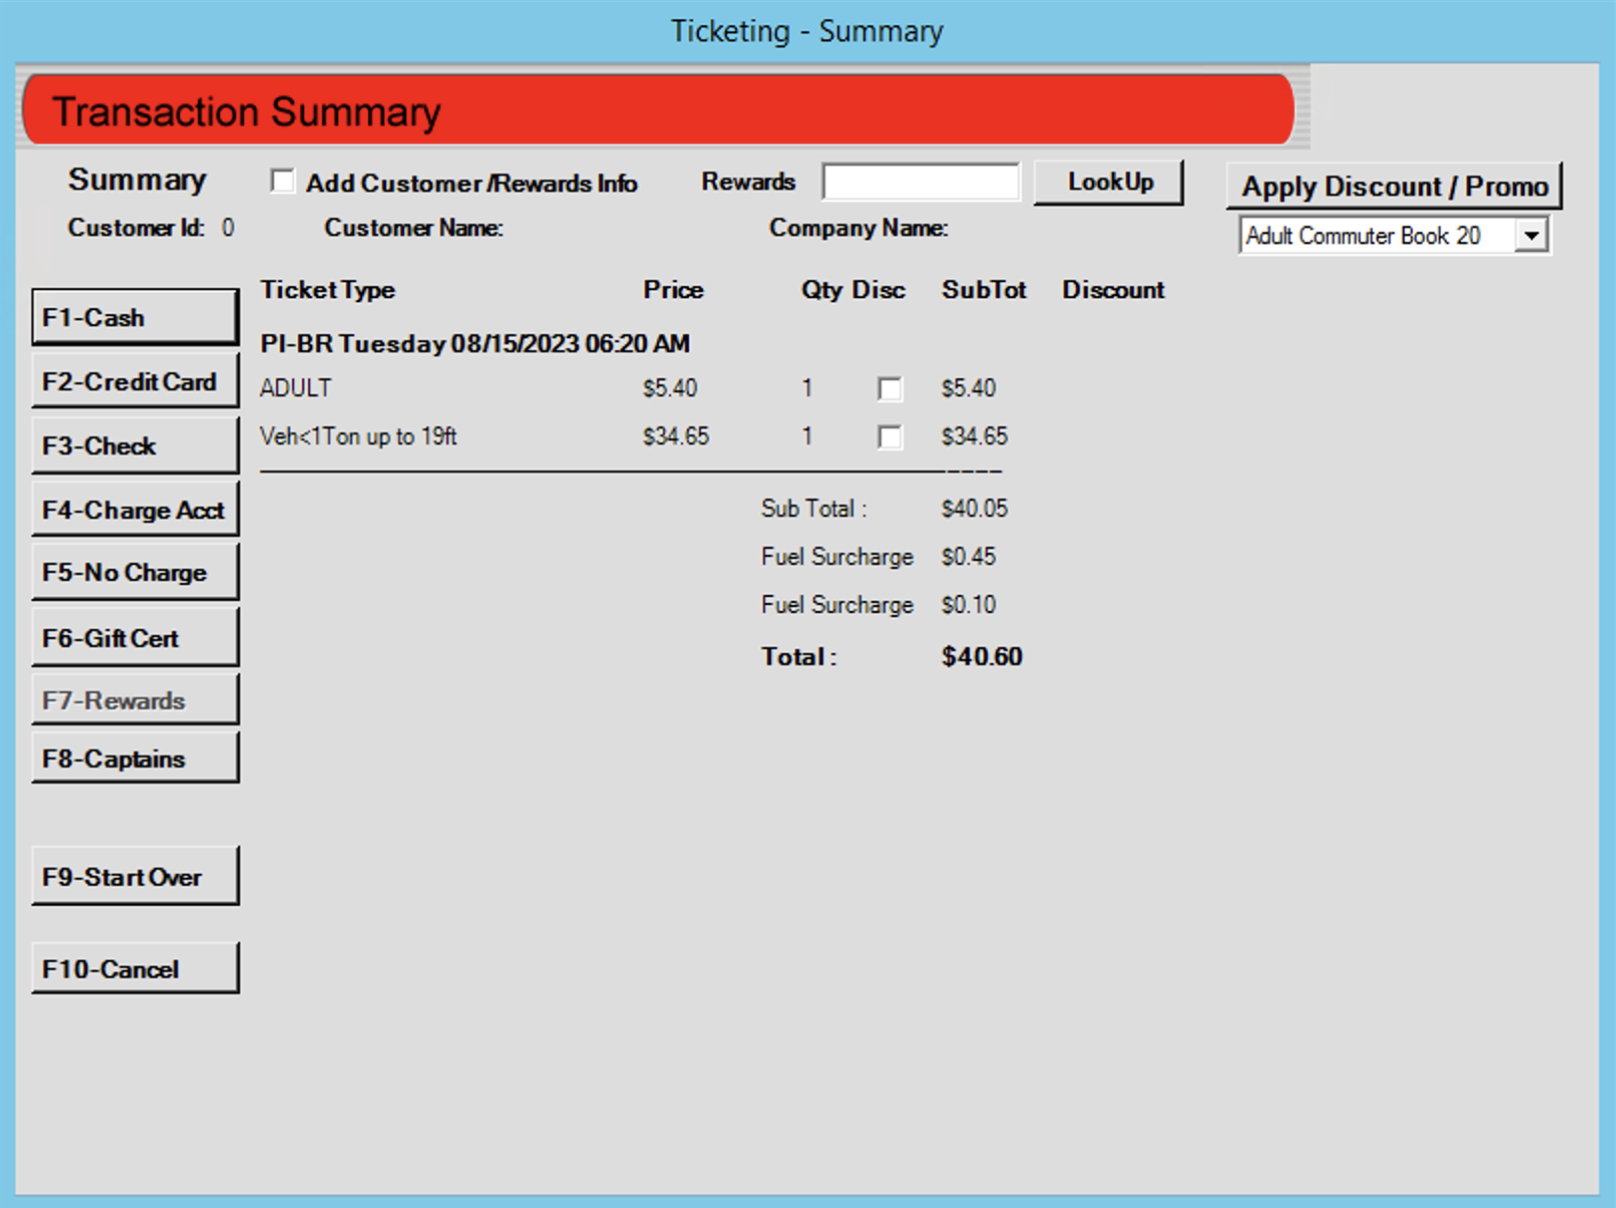
On the Ticketing – Summary screen you will be able to apply discounts to the selected tickets. You will also be able to apply a complimentary pass or gift certificate which will be explained in the payment section.

- Select which tickets you want to discount
- Select the applicable discount from the drop down box
- Click the
 to apply the discount to the selected tickets
 - After applying discounts select the payment method by using the F1-F8 keys or by pressing the button to the left.
- If you are in POS mode skip to Selecting Payment Type. If you are in Call Center mode go on to Customer Information section.